Thursday, August 18, 2011

Blueberry Streusel Muffins


I could wax poetic about the joys of breakfast for days.  What other meal so deftly combines the sweet, the salty and the ooey gooey?  With a plate of pancakes, scrambled eggs, hash browns and not-sausage covered in maple syrup, I am quite the happy gal.

Yet a steady diet of aforementioned fare will surely increase the waistline as well as the chances of contracting Type II die-ah-beed-us, so we can't live like obese monarchs every single morning.  

Enter the humble, yet tasty, muffin.  The heartier sibling in the mini-cake tribe, you can throw just about anything into a muffin: fruit, grains, cheese, vegetables.  As a kid, I relied heavily upon the Martha White muffin mixes in a bag.  Add in some water or milk, maybe some oil, and you were ready to fill in some muffin tins.  The mixes were completed with pellet formed "fruit", small cylinders of blue or red color chock full of corn starch, dye and artificial flavors.  Yum!

Alex's friend came to visit us a few weekends ago, and I thought that I would make something special for breakfast.  Here's my recipe for my first-ever try at REAL blueberry muffins:

2 cups all purpose flour or cake flour
1 1/2 teaspoons baking powder
1/2 teaspoon salt
1/2 cup (1 stick) unsalted butter, softened
1 cup sugar
2 large eggs
2 teaspoons vanilla extract
1/2 cup whole milk
2 cups blueberries, fresh or frozen

Streusel Topping:
1/3 cup sugar 
1/4 cup flour
1/4 cup oats

2 tbsp butter, softened
1 tsp cinnamon


Oven at 350- grease or paper your muffin tins!


Sift the flour, baking powder and salt together.  Cream the butter and sugar.  Add the eggs, vanilla and milk into the creamed sugar.  Once it is combined, add it to the dry ingredients in three or four installments- don't just throw it all in at once.


Fold the blueberries into the mix.  Spoon the finished batter into your muffin tins.  This recipe should yield 12-16 muffins, depending on where your fill line may be in your tins.


For the streusel, melt the butter and add in all the ingredients.  You can mix it with a fork or with your fingers.  Sprinkle the streusel directly on top of the batter in the muffin tins.


Bake these babies between 20 and 25 minutes, then let them cool thoroughly.  Hot blueberries can be like lava bombs, which isn't so great.


Perhaps you're wondering what's up with the flour choices?  Well, cake flour is incredibly fine and makes a very soft, almost silky cake.  All purpose flour isn't as refined, so the end result isn't as smooth, but it is just as tasty.  You don't need to change baking times for either flour, nor do you need to whip out the fine china if you use the baking flour.


You may, however, want to ration these muffins.  They are crazy good!

Banana Bread

If you're anything like me, your heart is in the right place when it comes to eating healthy.  I buy vegetables and fruit with the firm intention of eating them, but more often than not, they go bad and I end up feeling pretty silly.  When veggies start to turn dark, there's not much you can do with them.  But when fruit starts to turn dark and get spots, it's not always the end of the line- this is especially the case with bananas.


The darker the fruit, the better- so long as it isn't moldy or harboring banana spiders.  According to Alex, these little beasties are shaped like bananas and may or may not have bananas for legs.    


For my recipe, I used the following:


1 stick butter, softened
2 large very ripe bananas
1/2 cup sour cream
2 large eggs
1 1/2 teaspoons vanilla extract
2 cups cake flour
3/4 cup plus 2 tablespoons sugar
1 teaspoon baking soda
3/4 teaspoon baking powder
1/2 teaspoon salt
1 cup chocolate chips


Butter and flour bread loaf pan, set aside.


Purée the bananas with the sour cream, eggs and vanilla.  Sift the dry ingredients together (using cake flour makes a very nice, very soft bread- I used whole wheat flour on a second banana bread run, and it was much more dense and not as sweet).  Mix the butter into the dry mix until you get a crumbly mixture, then add in the wet ingredients.  Mix until thoroughly blended, and then fold in the chocolate chips.  


Feel free to use more than one cup- serious chocoholics may prefer different types of chips, as well.


Bake at 350 degrees for 60-70 minutes.  Remember to turn the pan half-way through the bake time!


This bread/cake is amazing- and really hard to keep around.  It's great slathered with butter, cream cheese, or Nutella.  


Sunday, July 31, 2011

Two months?! You deserve better!

Summer hit us like a ton of bricks and we've let our blog fall to the wayside.  Shame on us!

However, we have some news to share- we're engaged!  We'll be exchanging vows next year and collecting reception food ideas here.  If you have any ideas to offer, we'd be more than grateful to hear them!

We'll also be in Germany for about ten months, and we plan on recounting our culinary escapades here- I for one cannot wait to try my hand at making authentic pretzels, not to mention convenient public transportation and a variety of markets.

We hope you haven't forgotten about us, and we promise to be better about posting.  

Tuesday, May 31, 2011

Mock Mashed Potatoes

Lots of posts because Blogger has gotten over its latest bug- and not a moment too soon! 


Who doesn't love mashed potatoes?  A must-have at family gatherings, a quintessential comfort food, mashed potatoes have a special place in the American culinary heart.  They have a huge place in my own heart, mostly due to the fact that I can' indulge in them as often as the average citizen.  Thanks to the innovation and creativity of my Mom (and a little help from Martha Stewart), I now have this alternative version of mashed potatoes to share:
That's right- turnips and parsnips!  Put them together and you've got a veggie mix that can be used as mashed potatoes or as filler for samosas, which you'll read about in another post.


What you'll need to recreate this amazing alternative:
1 lb turnips
1 lb parsnips
1/3 cup melted butter
1/4 cup cream cheese
2 cloves minced garlic
Salt & pepper to taste


Peel and cut the turnips and parsnips into chunks- no matter the size so long as the chunks are consistent.  Boil for 20 minutes, or until the vegetables are soft.  Drain and let cool, then place in large food processor.  Add melted butter, cream cheese, garlic and spices.  Pulse and chop until the mixture is smooth.  
Voilà!  This mix brings back memories of Thanksgiving and Christmas, as well as the good ol' days when I could eat mashed potatoes to my heart's content without suffering the consequences.  True, the consistency isn't quite as velvety as potatoes, but the taste is much more interesting.  The turnips and parsnips, unlike potatoes, have distinctive tastes that aren't overpowering.  Alex mentioned that there was a certain earthiness missing from my turnip-parsnip mix, but this was quickly remedied with the addition of lentils.  I've got big plans for this mix, including but not limited to pot pie filler, pie crust, turnip tots, and baked chips.  

Market Finds: Daisy Mae's Market

Our last trip to the Findlay market was one of our most rewarding.  We met Barbra of Daisy Mae's Market and were permitted to take a few photos of their offerings:


You can check out Daisy Mae's Market in their usual spot at Findlay Market, right out front facing Race Street.  They have many staples as well as more exotic fruits and vegetables, but most importantly, a serious commitment to locavore culture and city revitalization.  Here is their website:

http://web.mac.com/barbcooper/daisymaesmarket/Welcome_to_Daisy_Maes_Market.html

To Key Lime or not to Key Lime

As a kid, I spent several summers in southwestern Florida, avoiding the great outdoors and trying my best not to stick to my GG's leather couch.  During one particularly sweltering season, I was formally introduced to the Key Lime Pie.  My grandmother, being the purveyor of all things classy, insisted that Key Lime Pie is only made from Key limes, and that anything else was a serious grievance against good taste.  She even had a small Key lime tree in her backyard, a sparse looking little thing that bore maybe five tiny limes a year.  Needless to say, I was pretty perplexed as to how such tiny little fruits could create such an amazing sweet treat.  From that point on, I was hooked on Key Lime Pie and spent the dog days devising various plans to procure more pie.  The plans usually included creative use of alligators and projectile lizards.
"My pie desire knows no bounds!  Onward, Aloysius!"


That being said, I've had quite a lot of Key Lime Pie.  I'd even go so far to say that I am a connaisseur.  The pie is easy to make- there are only three key ingredients, and the crust is usually made from crushed graham crackers.  However, it's not always easy to procure Key limes, especially outside of Florida.  If you are lucky enough to get your mitts on a bag, they're tiny little spheres with a low yield of juice.  You'll sprain your fingers trying to juice those little buggers.  Most pie producers get bottled Key lime juice, but even there one has to be discerning.  Some bottling companies add in ascorbic or malic acid, which both add tartness, but the limes already have naturally occurring ascorbic acid.  I've even seen HFCS in bottled Key Lime juice.  Yeah, yeah, it's just like sugar and it's okay in moderation.  It's not okay in my Key Lime juice.


So what's a gal to do when she can't find any Key Limes but wants nothing more than some Key Lime Pie?  


She uses regular limes.  They're easily accessible, they're in season and I don't risk arthritis working with them.  My pie isn't a Key Lime Pie, but it's still pretty freaking great. 


Here's my variation on the Classic Key Lime Pie:
Crust:
1 1/2 cups crushed Biscoff cookies (the airline cookie, also known as speculoos)
4 tbsp melted butter
2 tsp salt


Mix all ingredients together, press into a pie mold (the size is your choice, but I use a 9" spring-form pan), and bake for 15 minutes at 350 degrees.
Pie:
3 eggs
1 can sweetened condensed milk
1 1/2 cup lime juice (I found that three large limes fit the bill this time)
*Lime zest is optional*


Beat all ingredient together until well integrated.  After the pie crust has cooled (or depending on your level of pie craving, while it's still warm), pour all the wet ingredients on the crust.  Bake at 350 degrees for 20 minutes, or until the pie is set.


And no Key Lime Pie is complete without whipped cream, which is so incredibly easy to make you'll ditch your Whip-Its addiction and start inhaling this:


1 cup heavy whipping cream
1/3 cup sugar
2 tsp vanilla extract


Whip on high until soft or hard peaks form- it's your preference!  However, don't beat for too long because the cream will turn hard and get packed into the beaters.  Not good for your pie, but actually really good if you stick them in the freezer.  Creamsicles!


Here's my Off Key Lime Pie:


No gators were harmed or exploited in the creation of this pie.

I'll be making one of these as needed throughout the summer.  Nothing cuts through the misery of sweating through your clothes and sticking to your furniture like the tart sweetness of limes.  This can even be kept in the freezer- so long as you cut the pie first- for an icebox version.  Here's to keeping cool! 


Friday, May 20, 2011

Laissez les bonnes crevettes rouler!


Achtung! This will be the first in a series of dual-author posts. Alex will write the first section of this post and Alana the second. You'll know who is talking by the font.

Yesterday, between teaching, grading, and seeing a lecture on the Tea Party at school, I decided that nothing in the world sounded better for dinner than a po' boy. For the sake of clarity, a po' boy is a sandwich that is to New Orleans what pizza is to Chicago and New York, what cheese is to Wisconsin, wine to California, Jazz music to New Orleans, etc etc. Analogy time! A po'boy : New Orleans :: Jazz : New Orleans. In constructing my analogy this way, I'm setting "a po'boy" on par with "jazz" in such a way to imply that they both hold relationships to New Orleans that are similar. What I'm trying to say (albeit in a pedantic, long-winded, and somewhat logically flawed way) is that a po' boy is the culinary incarnation of New Orleans-style jazz. You'll see what I mean.

While visiting NOLA, I've become a veteran po' boy eater. Since they're most often made with seafood, this is good for me, but it also means that if you want reviews of chicken or beef po' boys, you'll have to do some independent research. Anyway, I've eaten them in rather nice restaurants, at hole-in-the-wall restaurants, plain, with hot sauce, with remoulade, and with different types of bread and vegetation, which has led me to what I consider the best po' boy recipe ever created. (Note: I'm not cajun or creole, I don't practice voodoo, and I barely speak any French, much to my girlfriends dismay, but I do cook and part of my soul still resides in New Orleans)

After learning all about the Tea Party (bunch of populist crazies, them), Alana and I went off to Whole Foods to pick up some shrimp, bread, a tomato, and some other miscellany. We found fresh de-veined, de-shelled shrimp on sale for $9.99/lb (down from 12.99) so we got 2 lbs figuring we'd use one and freeze the other. We found a wheat French baguette, the tomato and the rest and headed home to whip up a batch of wonderful. Ordinarily in NOLA, a po' boy calls for a mountain of popcorn shrimp, but these 36-42s were too good to pass up -- and they were fresh!

This is where the narrative splits. I dealt with cleaning and frying the shrimp, cutting the bread and tomato, and some of the finished sandwich construction and Alana made the sauce, mixed the spices, breaded the shrimp, and did some construction of her own.


As simple as a po' boy may seem, its success or failure hinges upon the quality of all its parts.  I never had a po' boy until we were in New Orleans, and while we tried quite a few, I was never really all that impressed.  Sure, the seafood flavors were always present- you can't really beat Louisiana crawfish.  Sometimes there were fried green tomatoes accompanying the star player, sometimes there was a remoulade.  However, there was always something missing.  Had we ventured out into la vrai bayou, we may have had some toe-curling sauce and some slap-yo-mama fried shrimp.  However, as with most touristy towns, we got touristy food while we stuck to Bourbon Street.


That isn't to say that the po' boy didn't stick with me.  Since our trip I've had a few cravings for po' boys, but since I thought that it would be too labor intensive to make them, I decided I would wait until we found a passable cajun restaurant.  When Alex and I left the lecture and he mentioned wanting a po' boy, I was more than willing to procure the necessary items and laissez les bons temps, or as we're saying, les bonnes crevettes rouler.


We used a remoulade and spice recipe from a blog I follow: Closet Cooking.  You can find the specific link here, but I highly suggest that you peruse Kevin's amazing (and extensive) collection of culinary delights.
Closet Cooking's Remoulade Sauce


For ease, I've gone ahead and listed the ingredients here as well:


Remoulade sauce- makes about 1/2 cup


1/4 cup mayonnaise (we used Vegenaise)
1 tablespoon horseradish mustard
1 tablespoon ketchup
1 small clove garlic
1 tablespoon lemon juice
1 teaspoon capers
1/4 teaspoon onion powder
1/4 teaspoon cayenne pepper
1/4 teaspoon paprika
hot sauce to taste

-Blend together until smooth

Cajun spice mix:
2 1/2 teaspoons paprika
1 teaspoon salt
2 teaspoons garlic powder
1 teaspoon onion powder
1 teaspoon black pepper
1 teaspoon cayenne pepper
1 teaspoon dried leaf oregano
1 teaspoon dried leaf thyme

I put about a quarter of the mix into the remoulade sauce, as well as a third in the flour we'd be using to coat the shrimp.

Alex and I were a bit perplexed about the breading process.  We both like fried food, and I grew up in Kentucky, the capital of fried chicken.  I'd always heard you used egg and flour, or milk and flour.  Alex had heard the same, but we wanted a crunchier crunch, so we decided to dredge the shrimp in breadcrumbs as well.  What a sticky mess!  After my first four shrimp I had a serious coating of flour and breadcrumbs on my fingers.  Yet in my opinion, the messier the recipe, the better the food will be.


Shrimp Frying:
After detailing (de-tailing, hehe) and washing the little buggers, I got the oil ready. I used just enough that the shrimp would float and stuck a candy-thermometer on the pan to make sure I wasn't going down the road of too-hot oil. After they were breaded, I fried them like a damn pro. GB and D. Golden-brown and delicious! I kept my oil at about 350F and fried 4 at a time so the temp wouldn't dive too much upon shrimp entering the pool.

Bread:
I cut the loaf into thirds, and then sliced one side open. In order to better fit all the stuff, I scraped out a bit of the bread making a trench. Sauce went on one side, vegetables on the other, and shrimp in the middle with the remaining sauce on the shrimp themselves.


How a po' boy is like jazz:
The complexity of the remoulade sauce stood on top of the solid shrimp/bread foundation and belted out a mind-blowing improv number that the sauce alone could never have done! Make this and you'll understand what I mean. As for cooking music, I recommend Panorama Jazz Band. You can find their stuff on iTunes. Now. Do it.


Taking a bite of this po' boy brought back all the good memories of New Orleans- relaxing under a tree in Jackson Square Park, traipsing along Frenchmen Street in search of good jazz, meandering through the drunken denizens of Bourbon Street.  The best memory of NOLA was experiencing the sights and sounds with Alex, and it was such a treat to prepare, assemble and enjoy these sandwiches. This is sure to become a stand-by recipe in our kitchen for years to come, even if we do wander out into the environs of New Orleans one of these days.  I guarantee!

Wednesday, May 18, 2011

Alfredo Forestier

If you reflect upon the different types of sauces you can put on pasta, you will probably notice that they almost all use tomatoes.  This can pose a problem for someone like me- I love pasta (carbohydrates in general) but I'm allergic to the tomatoes.  I can indulge a few times a month, but not as often as I get the hankerin' for an extra-large bowl of bucotini.  


Usually I go to my old-standby, alfredo sauce.  It's creamy, it's cheesy, and it works.  It's also a little bland. Having no spinach in the fridge to make a florentine, Alex suggested a bag of dried mushrooms I had been avoiding.  It was called "Mélange de la forêt", Forest Mix, and it had a giant morel among other desiccated scraps of fungi.  I tried not to scrunch my face in distaste.  Mushrooms?  No, thanks.


Here's a little tangent we can go off on together:


When I taught English in France, I went mushroom hunting with some friends.  My amies, Evelyne and Catherine, were almost giddy at the prospect of bringing home "des bons boletus" and cooking them up with some parsley.  As for me, not so much.  My plan was to enjoy the French forest and then think of some excuse to not have to eat whatever we found.  It's fungus.  It tastes like dust.  It feels like dust when you eat them raw.  They're rubbery when you cook them.  French or not, no mushrooms for me.  We drove out of town for about an hour, to Catherine's secret mushroom spot, and pulled the car over to the shoulder.  We had passed a small chateau on the way, and when I asked if maybe the forest was part of the land belonging to whomever owned the chateau, I got the typical French "pffff" response.  "We are looking for mushrooms, a product of nature, which are made to be eaten.  Those chateau dwellers won't be looking for them, they will just go to waste!"  Evelyne explained, but I remained unconvinced.


After about 45 minutes of wandering through some dense forest, we came to an area that was covered with boletus mushrooms.  Evelyne and Catherine started deftly picking the large fungi and depositing them into their baskets, chattering about different recipes.  As I crouched down to better inspect the boletus at my feet, I noticed someone walking toward me.  I looked and a sexagenarian in khakis and a light blue button-up shirt was approaching, asking me what I was doing.  "Euh, bon, je cherche des champignons avec mes amies..." I started, and immediately realized that this was the proprietor of the chateau and that we were going to be arrested for trespassing.  Merde!  I would be deported!  An American hunting for mushrooms, without a license, on privately owned land!  They might even revoke my passport forever!


Catherine and Evelyne came over at some point during my nervous breakdown and explained that they had been coming to this spot for years, there had never been a problem, and that we weren't doing anything illegal.  Apart from trespassing, that is.  The man countered, stating that there are signs on the road indicating that the land is privately owned and that trespassing is forbidden.  There were quite a lot of "pfff" sounds in this exchange.  Then they looked at me, frozen stiff with a boletus clenched in my fist, and explained that I was teaching English to French children and doing their country a service.  They, in turn, were trying to give me a cultural lesson about champignons.  The man seemed to soften at that, mentioning a trip he recently took to California where he got to go mushroom hunting.  He let us off the hook, but did ask for an armful of mushrooms.  


So my aversion to mushrooms isn't just a taste thing, it's a traumatic experience thing.   


Back to the alfredo sauce.


As I opened the pack of dried mushrooms, my mind hashing over the events I've just described to you, I figured it best to give the little guys a chance.  First they had to soak in warm water:
You can see the morel, as well as lobster, chanterelle and my good old buddy, the boletus, taking a dip and becoming quite pungent.  This was my opportunity to make the alfredo sauce and get the pasta boiling:


1 cup heavy cream
½ cup (1 stick) unsalted butter
1 clove garlic, grated
1 cup grated Parmegiano-Reggiano
Kosher salt
Freshly ground black pepper


I put all the ingredients into the same pot and let the butter and cheese melt down.  Once I had an even consistency, I let the sauce cook a bit longer to thicken it.  


Alex asked if I might be willing to throw in some greens, as well.  Since I had originally wanted to do a florentine, this seemed like a good idea- however, I wasn't so sure about collard greens.  He assured me that if we boiled them long enough, they would have the same texture as spinach but have better flavor.  


After Alex chopped up the reconstituted mushrooms, we stirred them into the sauce along with the greens.  This let the flavors meld together for a bit, and also let us know if we had enough sauce.  Once the pasta was ready and drained, we plated up what I now call Alfredo Forestier:
It was good!  To my great surprise, the mushrooms weren't rubbery or gross, they each had different flavors and textures that were well complimented by the sauce.  The greens were infinitely better than spinach in the sauce, and I've sworn off spinach in florentines.  Next time I'd like to use some fresh mushrooms, just to see how much the flavors might change.  The bonus of using dried mushrooms is that the leftover water used during reconstitution turns into a stock that can be used in a myriad of ways.  


And just as a side note- the boletus we collected in the privately-owned forest were really gross, but only because Catherine used No-Salt on them.  Given the chance, I'd go mushroom hunting again- but this time, I'd pay more attention to the signs. 

Back on track!

Blogger finally gave us back our lost posts, so this means that we can get back to blogging!  Posts to follow.

Celebration Dinner

After only a week and a half in Cincinnati, I have procured myself gainful employment that involves French!  This calls for a celebration!


I decided I wanted to make salmon, but I wasn't really sure of what else I wanted to pair or trio it with.  Insert heroic music here, because The Flavor Bible came once again to my rescue.  This book includes just about every single edible thing and lists what pairs with it well, really well and OMG-this-is-awesome well.  I refer to it often, especially when I'm cooking something I'm not too familiar with or when I want to change things up a bit. 


In the mind-blowingly-awesome pairs category, I found that potatoes, onions, shallots and a few herbs go fantastically well with salmon.  Previously I had only used a spice rub on salmon, maybe marinading it a few times.  Since I couldn't possibly make a spice rub or marinade with potatoes, or with asparagus which pairs well as an accompaniment, I decided to go another route.


Here's the recipe:
Ingredients:


Salmon
1/4 lb asparagus
1/3 lb red potatoes
One can of white beans (I used white kidney beans)
One medium sized shallot
Half of a yellow onion
3/4 cup mustard,  separated (I used Grey Poupon, poupon means "little baby" in French, but let's not go there)
2 tbsp ground fennel
1 tbsp tarragon
1 tbsp thyme
2 cloves of garlic, minced
1/3 cup olive oil
1/3 cup Vegenaise


Tools:


Small sauté pan
Two medium sized pots
Large sauté pan
Ziploc or comparable plastic bag for marinade


I purchased a 1.25 lbs slab of salmon with the intention of saving half of it for a later date.  For this recipe, I ended up using half of the salmon.  The produce came from our closest Kroger, so this meal isn't as local and organic as I would have preferred.  However, it was still quite good.  Also, it should be known that I didn't measure any of these items, and what I've listed here is an approximation.  You should feel free to use more or less of any of the ingredients, or add in whatever might strike your fancy.


Mince shallots and onion, place in a bowl.  In the plastic bag, combine olive oil, thyme, tarragon, 1/3 of the mustard and ground fennel.  Add one clove of minced garlic and some minced shallots to the mix, and after sealing the bag, mash everything together.  Once you've reached a uniform consistency (the oil and mustard might fight for a bit, but just show 'em who's boss), place your salmon in the bag and give it another good squeeze.  I let the fish marinade for two hours in the fridge.


For the salad, I chopped the potatoes into eight to ten smaller pieces.  Boil the potatoes for about ten minutes, or until they are soft.  I chopped the asparagus into 1/2 inch pieces, and also boiled them for about six minutes.  The onions and shallots that were left in the bowl were joined by the other clove of minced garlic and were sautéed for around five minutes, until they started to brown a bit.  In a large plastic bowl, I mixed the beans, potatoes, asparagus, onions and shallots and gave them a good stir.  Once they were evenly mixed, I added in the rest of the mustard and the Vegenaise along with a good helping of ground fennel.  With a large spoon I stirred until the salad was well mixed, and then promptly licked the spoon clean.  This stuff is good.  And it's vegan!
After the two-hour marinade, I kinda flubbed on the salmon.  I haven't been cooking with gas for very long, and sometimes I forget how quickly it heats up.  The salmon portions were placed in a hot sauté pan, and cooked for about three minutes on one side.  The heat was too high because I got a lightly carbonized outer layer and a not so cooked interior on both of my pieces.  Moral of this story: cook it low and slow.  A little patience is a good thing.

For your consideration, the finished product.  The salmon is pretty black, but its texture was not compromised.  I think next time I'll probably spear it with a fork a few times to get the marinade to really soak in.  Using fennel in both the marinade and the salad made a good pairing for both elements, but I think I could eat this salad every day for the rest of my life and never be bored.  


Here's to being a contributing member of the workforce!  Prost!


The best damn saag paneer you've ever had...and it's not saag paneer!

Last Sunday, Alana and I decided to go see Werner Herzog's new movie "Cave of Forgotten Dreams" about the drawings in Chauvet Cave in southern France. I say "we decided," but if I'm being honest, I was way more excited about it than Alana was. Let me explain. I love Herzog. I love his wacky, German-intellectual take on life (YouTube any of the "Werner Herzog Reads... videos), his filmmaking is astonishing, and the artistry of the final product is breathtaking. *deep breath* OK, all that aside, I decided it would be best to cook something before we left since we had lots of greens left over from our trip to Findlay Market earlier that week. (Collards and mustard for $1 a bunch!)

I wanted Indian food...specifically one of my favorites: saag paneer. For those of you not saag-savvy, paneer is Indian cheese and saag is spinach. I'm not an expert on Indian languages and I don't know whether the words are Hindi, Urdu, or one of the myriad of other oral-arts practiced on the sub-continent. The point is, the dish rocks and I thought with a little internet research (Manjula's Kitchen is a good one for vegetarian Indian food), and some substitutions, I could come up with something to squelch my spinachy stomach-lust.

Here's Manjula's ingredient list and my starting off point:
1 10oz chopped frozen spinach
1/3 lb paneer
2 medium tomatoes puree
1 teaspoon chopped ginger
1-tablespoon oil
2-table spoon of whole wheat flour (mixed with water)
½ teaspoon cumin seed
½ teaspoon turmeric powder
½ teaspoon red chilly powder
½ teaspoon salt or to your taste
1/3-cup heavy cream
½ tomato thinly sliced
¼ cup water
Pinch of hing or asafetida (optional)

After looking through my fridge, I found I had no spinach, no paneer, no fresh tomatoes, and less than half the turmeric that I needed. That's right. I expected to make saag paneer with neither saag nor paneer. Let me tell you, bothers and sisters, mine was better than any Indian restaurant's I've ever had. Here's my ingredient list:
1/3 bunch of collard greens
1/3 bunch of mustard greens (the spicier, the better!)
pinch of hing
almost all of a can of tomato puree
a bit of oil for frying
1/8 pound sliced mushrooms
2 Tbsp flour mixed with water to form paste (keeps the mess from separating)
1/3 cup heavy cream
1 tsp chopped ginger (fresh, please!)
1 cup cubed mozzarella cheese

And then the spices:
1/8 tsp turmeric
1/8 tsp crushed red chili (more if you like it hot)
1 1/4 Tbsp garam masala powder
1/8 tsp fennel powder
1/4 tsp garlic powder
1/4 tsp ground cumin
1/4 tsp chili powder
*Note: I don't measure spices, I add to taste and smell so all measurements are approximations

How I did it:
Over medium-high to high heat, add a bit of oil to a heavy saucier and then fry the shrooms. When done, evacuate to a paper towel for proper oil-whickage. Put some water on to boil while you wash and roughly chop your vegetation. Blanch the greens and immediately submerge in an ice-water bath to stop the cooking. Mix your spices together (not the hing) and set aside. Still have that mushroom oil? Good. You'll need to keep about 2 Tbsp in the pan. Over medium heat, wait until the oil is hot and add the pinch of hing. (Warning! Hing smells weird. Be brave, grasshopper, the weird smell is outweighed by the benefits of hing to vegetable dishes!) Add about half of the spices and all of the ginger to the hot oil and stir to combine. Once that's a smooth paste, add the tomato puree and stir some more. Once the mixture is hot, add the foliage and stir some more. Reach for the flour/water paste, dump it in the pan, and...stir some more. Once thoroughly combined, toss the heavy cream in the pool and stir (if your arm has fallen off at this point, ask a friend to help). Add the rest of the spices...while you stir...and the fried shrooms too. Cover and allow to cook for 5-7 minutes. Have you contemplated what to put your not-saag (naat-saag?) on? Now's a good time. Since Alana is allergic to rice, we did couscous with salty water. Vegetable broth makes a good liquid too. Next time I make this, it'll be mushroom stock that we have left over from another dish we recently made. Give naat-saag another stir. If you find that the sauce has started to stick to the bottom of the pan, you're done and you can add the mozzarella cubes. If not, re-cover and cook for a few more minutes.

While this is somewhat unorthodox, the mozz adds an extra level of richness, as well as a fun stringy-ness, to the finished product.

Ideas For Substitutions/Additions:
Chickpeas
Mushroom stock for the couscous or rice (as mentioned above)
Ground mustard powder might make a nice addition to the spice mixture
Firm Tofu - pressed and cubed

When substituting, go for earthy and rich flavors that will stand up to the dairy and the greens. If you need to brighten the spices a bit, add more garam masala and if you're feeling adventurous, think about some amchour powder. It's dried, powdered mango and while that seems weird, just a little will add brightness to the dish without adding an unexpected citrus punch to your face.

If you do play with this recipe, and I hope you do, please post your version in a comment!


P.S. A note on the lack of photo: we ate it all before we could snap one. If your pile of naat-saag looks like someone has already chewed it for you, it's perfect.


Sunday, May 15, 2011

C is for Cookie, Part One in a Series

Blogger has had some issues this week, most notably losing posts and comments.  Alex and I lost two posts and we've been a bit hesitant to continue posting- no one wants to spend time writing and then have the fruits of their literary endeavors disappear.  However, I've been on a baking kick (read: I've turned into the Cookie Monster and no one is safe) and I think you'll like what I have to show you.


First of all, these babies:


Nothing says sunshine and warm weather like lemons.  With temps in the low 80's last week, I was craving a summer sweet treat like lemon pound cake or lemon meringue pie.  With cookies, you get the sugar rush with the added bonus of handheld portability.  With www.foodgawker.com already opened on my browser, I searched for "lemon cookies" and came across a recipe from Une Gamine dans la cuisine, which you can view here:


Lemon Almond Cookies


I halved this recipe and also added in some lemon extract and slivered almonds.  As for the almond flour bit, don't fret- the almond flour you can procure at your local store is pretty expensive, but you can make it at home by throwing some blanched almonds in the food processor.  I didn't roll my cookies because we used one of our two lemons for dinner that night (post to come as soon as Blogger gets its negligent act together) and I consequently didn't have a lot of lemon zest.  Next time I'm going to add in some white chocolate chips for a more layered flavor act, and if I get brave, some candied lemon peel.  


Halving the recipe was not the best idea, because while my cookie lust was at an all time high this week, Alex gave me a run for my money.  Those lemon almond cookies were gone in record time, and I highly suggest making two batches if you can.


When the last cookie was gone, my baking gears got to turning.  What would I make next?  Simple chocolate chip?  Snickerdoodles?  Chocolate chocolate chip?  We had recently devoured a pint of mint chocolate gelato, and we had just purchased some fresh mint at Findlay Market.  Ça y est!  That's it!  Mint chocolate cookies!


I'll even list the recipe for you this time:


  • 1 cup butter, softened
  • 1 cup white sugar
  • 1 cup packed brown sugar
  • 2 eggs
  • 1 teaspoon vanilla extract
  • 3 teaspoons mint extract (more if you like!)
  • 1 teaspoon baking soda
  • 2 teaspoons hot water
  • 1/2 teaspoon salt 
  • 3 cups all-purpose flour
  • 1 cup semisweet chocolate chips
  • 1 cup Andes Crème de menthe baking chips
  • Green food coloring
  
I placed the sugar and extracts in my mixer and then added the butter once it warmed to room temp.  This was when Alex asked why we didn't have a butter dish and I scoffed at the thought of having butter at room temperature.  He has a point, though.  While the butter was warming up on the stove, I put the baking soda and salt in a bowl with the hot water and mixed it.  The eggs went in another bowl, as did the flour, and then the chocolate and mint chips.  After I creamed the butter and sugar, I added in the baking soda mixture, and then the eggs, one at a time.  During this process, I was sniffing the batter to be sure that I could smell the mint.  I listed three tablespoons, but I believe I ended up using six and getting around ten on my hands.  The McCormick easy-pour spout is obviously false advertising.  


Then comes the flour, in half cup increments.  After everything is well integrated, I started adding in a few drops of food coloring.  Since the batter itself was not white, I knew that I wouldn't get a nice mint green, and that was okay.  Once I obtained an acceptable verdant hue, I started to add in the chips.  This is what I got:


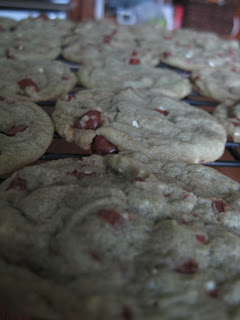
Yeah, I didn't think it looked that great, either.  But the batter was good, the mint and chocolate flavors were perfectly balanced, and the time in the oven would surely affect the color.  I baked the cookies at 350 degrees for about 12 minutes.  The finished product:


Moral of the story: use more food coloring.  To go along with the incessant loop of "C is for cookie, that's good enough for me!", Alex mentioned that the cookies looked like Oscar the Grouch.  I have to agree, although I don't like the implication that my baked goods live in a trash can.


What other cookies can I make in the Sesame Street vein?  Strawberry rhubarb for Elmo?  Blueberry blackberry in an homage to my favorite muppet, Grover?  Chocolate chocolate chip for Snuffleupagus?  The possibilities are endless, which is very good, because this girl can't get enough cookies.

Wednesday, May 11, 2011

Fleur de Sel Caramels and Pralines

Man, I hated chemistry.  Our teacher was seriously deranged and she called us all Twinkie, regardless of gender.  My lab partner would invariably get into the magnesium strips and light them up during experiment time, and each day I was truly frightened by the lack of vents in our classroom.   


Yet I love making candy and baking, both of which are made possible by chemistry.  The measurements have to be exact, the temperatures have to be spot on, timing is crucial.  Once you've got your finished product, there ain't no tweaking it.  But when you make a fantastic cake or wonderful candies from scratch, it's a pretty darn good feeling.      


One of my favorite French candies is Caramel au beurre salé : salty butter caramels.  They are made with French sea salt, also called Fleur de sel, and the fantastic butter local to the Brittany region.  These little gems are the perfect marriage of salty and sweet, thrown in with some cream for good measure.  I can never eat just one, and usually I devour all the candy I purchase for friends and family.  Sorry, guys, I just can't resist.  Postcards are just as good, right?


So what is Fleur de sel?  It's definitely salt, but it's not what you'll find on most tables.  Usually from Brittany in northwestern France, it is the top layer of sea salt that is scraped by hand from large salt pans.  The resulting crystals are much bigger than regular table salt, but also much finer.  My jar even touts it's "scents of minerals and violets" (it's true, it does smell like violets), and France has even named some of the larger Fleur de sel companies "Remarkable Taste Sites".  It is France, after all.


When I came across a recipe for Fleur de Sel Caramels, I instantly bookmarked the site and ran in my kitchen to be sure that I had everything I needed.  With a few little tweaks, I present to you the recipe:


Ingredients:
1 cup heavy cream
5 tbls. unsalted butter, cut into pieces
1/2 tsp vanilla extract
1 vanilla bean pod, split lengthwise and scraped
1 1/4 tsp Fleur de sel, plus more for sprinkling
1 1/2 cups sugar
1/4 cup light corn syrup
1/4 cup water


Tools:
Small saucepan
Medium or Large heavy base pan
Candy Thermometer
Wooden Spoon
Parchment paper
8x8 baking pan
Wax paper, cut into squares


Prepare your baking pan first!  I've found that the caramels are usually slick enough that greasing the parchment paper doesn't seem like an important step- but I still butter it up, so I suggest that you do, as well.  I usually try to cut the parchment paper to make it fit the pan exactly, but so long as the paper is large enough to keep the caramel from oozing into the pan, there's no need to be Type A.


In a small saucepan, combine the cream, butter, vanilla extract, vanilla pod and scrapings, and salt.  Over medium-high heat, cook until the butter has melted, and then turn off the heat and set the mixture aside.


In a heavy-bottom pan (preferably not a dark pan, because you need to see the color change in the sugar mixture), combine sugar, corn syrup and water.  Give it a good stir to make sure everything is mingling well.   Blast it with the highest heat you can, and keep an eye on it.  Soon it will start to bubble and you'll be tempted to start quoting MacBeth, which is totally fine, so long as you don't start throwing magical bits into the sugar.  I can't stress enough how important it is to be patient at this point and that you absolutely cannot stir the sugar.  You can swirl the pot around, but no spoon should touch the liquid while it's cooking. 


Now is a good time to take the vanilla bean pods out of the cream mixture.  You definitely don't want those things in your caramels. 


Once the sugar soup turns medium/dark brown, carefully place your candy thermometer in the pot.  You may want to practice this step ahead of time.   Carefully pour the cream mixture into the sugar- seriously, be careful!  It will bubble up furiously and that stuff is wicked hot.  Once the cream is in the sugar, stir the entire mixture together and start monitoring the temperature.  My original recipe stated that I wanted the heat to reach 248 degrees, which on my thermometer is listed as "firm ball".  After playing around with the temperature, I found that the best is somewhere between soft and firm ball.  If it goes over firm ball, you're going to have a bunch of Werther's.  If it doesn't get to soft ball, it won't ever set but you could still use it like a sauce.  


Once you get the temperature up to the desired point, turn off the heat and pour the caramel mixture into the prepared pan.  Use the stirring spoon to spread out the mixture evenly.  Use a bit more Fleur de sel to sprinkle on top now, while the caramel is still hot.  If you wait too long, it won't stick.  


Now you wait for it to cool.  I usually find some way to test my caramels by pulling off a bit from the corner or peeling some from the side of the paper.  Quality control.


This is when you can start cutting up the wax paper.  I don't have a  lot of advice here because 1) my wax paper squares always end up as rectangles and most of them don't even wrap a single caramel and 2) the size of your squares depends on the size of your caramels.  For me, it's different every time.  


Once the caramels are cool you can peel the paper off and start to cut them into pieces.  I use a pizza cutter for this job, but a large kitchen knife works, too.  Wrap up your pieces in wax paper and voilà- des caramels au fleur de sel!


These little darlings are the fruits of my latest caramel endeavor- but as you can see, they aren't quite dark enough to be caramels.  They're pralines, actually.  Here's a story:


When Alex and I went to New Orleans in March, we kept seeing signs advertising pralines and other sugary treats.  I decided that pralines are a much better gift than beignets from Café du Monde (they don't really keep that well), so we purchased some on our last day.  Pralines in Europe are made of chocolate, but here in the States, and especially in the South, they're made of sugar and pecans.  When we got back home, I looked up a few recipes and noted that they were the same as my caramel recipe, just with less cooking time and chopped pecans added in.  


Last week, instead of using my usual silver pot, I used one of Alex's darker pots.  I couldn't tell what color the sugar mixture was becoming, and lacking patience, I put the cream mixture in too early.  Instead of a dark brown, caramelly color, I had a yellowish mixture.  "Alas," I thought, "my caramel aspirations have been dashed!"  The mix also took forever to set, and even when I cut them, they did not want to keep their semi-geometric shapes.  However, they tasted great!  We could see the little vanilla seeds in the mix!  After a few days, we discovered that the pralines had started to crystallize on the outside, which adds a whole new dimension to the soft texture.  


As I mentioned before with the parchment paper, there's no need to be Type A with this recipe at all.  Playing with the temperature and cooking times has yielded incredibly yummy results every time, and I've found that I can make caramels or pralines for every preference: hard, soft, chewy textures and intense or lighter flavors.  Give them a try, but be warned- you'll want to eat them all, so tell your friends and family that you are making them in advance.  That way, you have to give them some, and you won't feel like a complete glutton for eating 64 or so caramels.